Removing a tree from your property can seem overwhelming, especially if you are tackling the task for the first time. With careful preparation and an understanding of the appropriate methods, homeowners can safely and efficiently manage tree removal. When in doubt or if the tree is large or dangerously positioned, reaching out to tree removal and trimming experts in Utah is the safest course of action.
This thorough guide outlines the key steps to ensure a smooth, safe tree removal process. From planning and preparation to the final clean-up, you will find key strategies to minimize risks and protect both your property and yourself throughout the task. Proper planning is important not only for safety but also for efficiency. By following safe practices and using appropriate protective equipment, you can significantly reduce the risk of accidents or property damage. While some homeowners can manage small tree removals, it is vital to know your limits and recognize when to call a professional. Assess each phase carefully, use quality tools, and take every recommended precaution to guarantee a safe process. For larger or more complex removals, err on the side of caution and consult with experts to prevent injury or costly mistakes.
Key Takeaways
- Assess the tree’s stability and location before removal.
- Gather suitable tools and prioritize safety equipment.
- Plan the tree’s fall direction ahead of time.
- Apply the correct sawing techniques for a controlled fall.
- Seek professional help for large or risky removals.
Assessing the Tree and Its Surroundings
The first step in any tree removal project is to carefully evaluate the tree and the area around it. Inspect the trunk for signs of decay, cavities, or disease that could cause unpredictable behavior as the tree falls. Take note of any large dead branches, splits, or a pronounced lean. An unstable tree increases the risks involved, so exercise additional caution if any warning signs are present. Survey the surroundings before proceeding. Look for nearby power lines, fences, buildings, or other structures within the fall zone. If the tree is close to any utilities or property, special handling will be required to avoid accidents and costly damage. Make sure children and pets are kept at a safe distance while work is underway.

Gathering the Right Tools and Safety Gear
A successful and secure tree removal hinges on using the correct tools and wearing the proper personal protective equipment. Essential tools for the job include a reliable chainsaw or handsaw, sturdy rope to steady and guide the tree, wedges to prevent pinching during cutting, and a well-stocked first-aid kit in case of emergency. Your safety should be the top priority. Protect yourself with a hard hat, safety goggles, durable gloves, steel-toed boots, and hearing protection if you are using loud equipment. Before beginning, double-check that all gear and machinery are functioning properly and that chainsaws are sharp and well-maintained.
Planning the Felling Direction
Understanding and deciding the best direction for the tree to fall is critical for safety and for preventing damage. The ideal fall direction is usually aligned with the tree’s natural lean unless obstacles make that dangerous. Consider the wind direction and forecast on your workday, as wind can easily change the path of a falling tree. Clear away any debris, objects, or vegetation in the intended fall path. This step creates a wide and safe landing area, reducing the risk of property damage or injury. It is also wise to establish more than one escape route that you can use once you make your final felling cut.
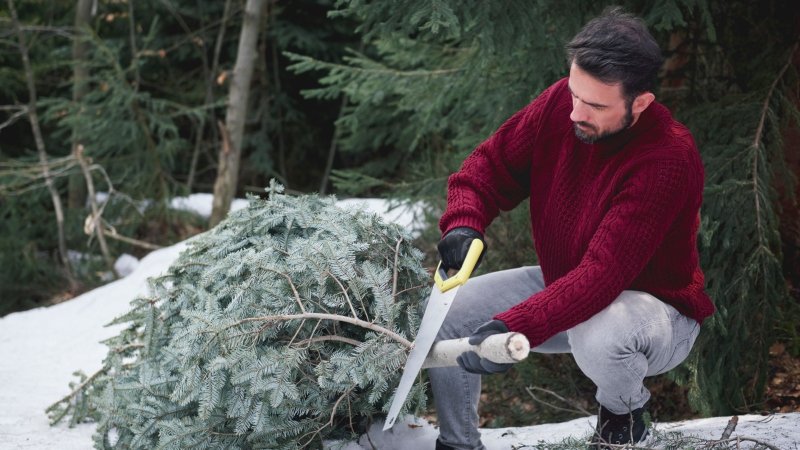
Making the Cuts
Whether you are dealing with a small backyard tree or a mid-sized specimen, using the correct sawing technique is fundamental to safe removal. Begin with the notch cut on the side facing the direction you want the tree to fall. This involves creating a notch with a flat horizontal cut and an angled cut above it, forming an open wedge that extends about one-third of the way through the trunk. Move to the opposite side and make your felling cut. This horizontal cut runs slightly above the notch base and extends straight into the trunk. The felling cut should not meet the notch completely, leaving a “hinge” of wood. This hinge helps guide the tree’s descent.
Post-Removal Cleanup
Once the tree is safely on the ground, cleanup begins with limbing, removing all branches from the trunk. Next comes bucking, where you cut the trunk into manageable pieces for disposal, firewood, or further processing. Sessions should proceed slowly and cautiously to avoid injury from moving logs or sharp branches. Stump removal is the final step. Depending on your long-term plans for the space, you can let the stump decay naturally, grind it down, or apply safe chemical treatments to speed decomposition. Collect and dispose of all debris to restore the area and prevent tripping hazards or obstructions in your yard.
When to Call a Professional
DIY tree removal is sometimes possible for small, easily accessible trees, but certain situations require the knowledge and equipment of tree care professionals. If the tree is large, growing near power lines or close to your home, or shows signs of significant decay or instability, seek help from certified arborists. These specialists can safely handle difficult jobs and protect surrounding property.
For further details on assessing which projects are best left to professionals and other safety tips, the Bob Vila article on felling trees offers valuable guidance.
Conclusion
Tree removal requires careful planning, the right tools, and strict attention to safety at every stage of the process. By properly assessing the tree, preparing the fall direction, using correct cutting techniques, and completing cleanup responsibly, homeowners can reduce risks and improve efficiency. However, for large, unstable, or hard-to-reach trees, hiring a professional is the safest option to prevent injury and property damage

